Designing a 3D printer kit: Packaging
September 15, 2011
This is the third entry in a series of four exploring the design, packaging and user experience of 3D printing kits. Each article will be published to the front page of this blog, but you can also find them, as well as other articles I’ve written about open-source 3D printing, on my 3D printing topic page.
Packaging
Once I collected all the parts, the next step was to start actually packaging everything. The goal of this project was to focus on making a kit that’s accessible to mass market consumers, which I think implies that it’s (a) free of problems that only experts know how to solve, (b) organized, and © helpful during the build process - users should encounter parts as they need them, for example, not all at once. Where possible, the kit should also look interesting and inviting, and worth talking about and showing off.
I did a few things to try to move toward these goals. _ _
Staged packaging
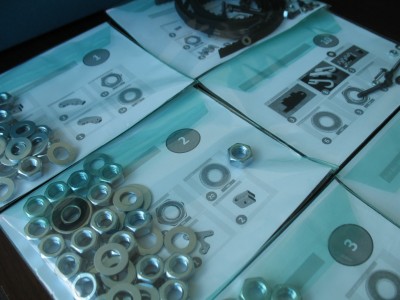
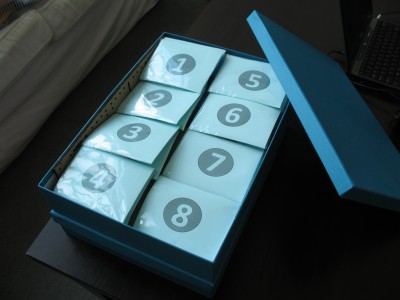 [caption id="attachment_1515" align="alignleft" width="400" caption="The top of box #1, with the first set of numbered envelopes visible."][/caption]
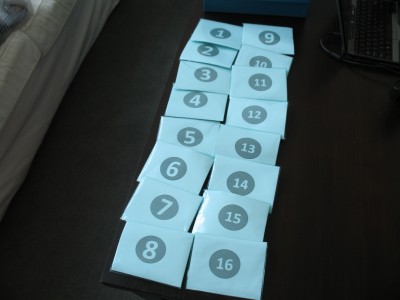 [caption id="attachment_1516" align="alignleft" width="400" caption="All 16 envelopes."][/caption]
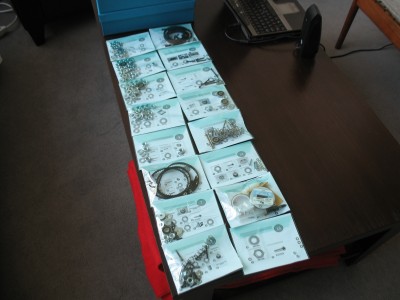 [caption id="attachment_1518" align="alignleft" width="400" caption="The reverse of the envelopes, with their contents."][/caption]
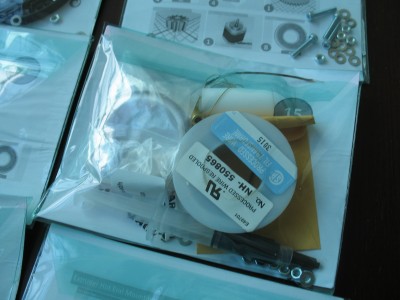 [caption id="attachment_1520" align="alignleft" width="400" caption="Closeup of envelope 15."][/caption]
 [caption id="attachment_1523" align="alignleft" width="400" caption="A few more of the envelopes."][/caption]
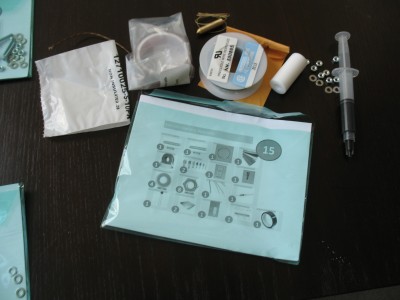 [caption id="attachment_1525" align="alignleft" width="400" caption="Envelope 15, unpacked."][/caption]
In my experience with 3D printing kits, parts are typically packaged together by type, instead of by construction step. So, for example, all the nuts of a certain size will be in the same bag. Worse, actually – all the nuts of all sizes are often in the same bag. So are all the washers, all the bolts, etc. This creates a number of problems:
You have to dig to find a screw (nut, washer, etc.) of a certain size.
You have to manually count out all the nuts you need for a certain step. So, for example, if you need 12 washers, you need to pour out your bag of washers, and then find and count out 12 of the right size.
You also have to find somewhere to store these washers while you are using them, which makes it easy to lose important parts, and less smooth to pause and resume assembly (since you may have a large number of different parts lying around your workspace in different places). Sure, it’s easy to find a little bowl or something to hold the parts you’re using, but why?
If you don’t have an intuitive sense of which screw is 25mm long vs. 20mm long (for example), it’s easy to accidentally use the wrong part. It may then be impossible to fix your error without a large amount of time-consuming disassembly.
It’s slightly intimidating to look at a huge amounts of parts all at once, and know that you will eventually need to fit them together. Like the feeling you get when you unpack a 1,000-piece jigsaw puzzle.
Packaging this way is also a missed opportunity. If, on the other hand, parts are organized by step, the packaging itself can help to lead the user through the build process. So, I decided to split the assembly up into 16 stages, and assign each stage an envelope that contained the necessary build parts for that stage. There are a few large parts (including 3D-printable parts) that couldn’t be included in envelopes, but these can be found and identified easily as necessary. I chose translucent plastic envelopes, because these can be easily and non-permanently closed, and because the parts can be seen inside before the envelope is opened.
Each envelope contains a card that can be read through the envelope. On the front, this card clearly specifies the step number corresponding to each envelope, and on the back is printed a visual bill of materials listing the parts that should be inside the envelope. Having a set of pictures corresponding to all the necessary parts makes it easier for end-users to identify the parts they’re using, and is also helpful for manufacturing, allowing a packager to quickly sort all the parts into their respective buckets by putting each card in a Tupperware sorting container as a guide. Card and container contents can then be transferred together into an envelope.
Vacuum-molded containers
[caption id=“attachment_1382” align=“alignleft” width=“391” caption=“You end up with a perfectly-molded plastic tray…”]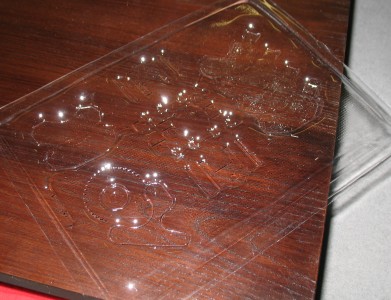 [/caption]
[caption id=“attachment_1512” align=“alignleft” width=“400” caption=“Closeup of the packaging.”]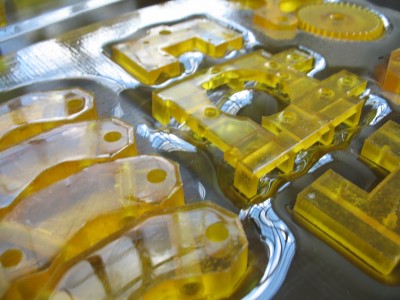 [/caption]
Often, the 3D-printable parts in a kit like this are packaged unceremoniously together in a Ziploc bag or box. (As mentioned above, I refer to them as “3D-printable” because I used cast resin, not a 3D printer, to make them).
This looks strange, and it also makes it difficult to find a part when you need it – you have to dig through all the parts, every time you need one. This difficulty is compounded by the fact that (a) there are a few quite large 3D-printable parts, which can make it difficult to extract the small ones if they’re all packaged together, and (b) many of the parts are complex shapes that are difficult to identify.
To solve these problems, I decided to use vacuum-formed plastic to package the 3D-printable parts. I talk more about vacuum-forming here, but basically a layer of warm plastic is put over a tray containing the parts, then stretched to fit them as it cooled. The result is a tray with a little molded space for each 3D-printable part. Molded packaging is cheap, but makes it easy to see all the 3D-printable parts at once, so it’s easy to find and extract the correct part when you need it. Related parts can be kept together (such as the x-end-idler and x-end-motor and their matching clamps), and labels could easily be added to the tray to make identification even easier.
Reducing or eliminating soldering, epoxying and crimping
There are several parts that come with kits that require partial assembly before they can be used. This includes cables, which sometimes come as bare wires and connectors and therefore must be cut, stripped, and crimped, and it also includes other parts such as the extruder, which requires that a length of heater wire be wrapped around the extruder nozzle, taped in place, and soldered to connecting wire.
I think companies like Makerbot have largely eliminated these steps from their kits, but in any case I think RepRap kit contributors should be aiming to do so also. It will be hard to gain popular acceptance for a kit that requires learning how to solder (or even use a multimeter) if you don’t know how to do it already.
Tools
Most kits include a set of hex wrenches or other small screwdrivers. I wonder whether, optionally, you could get an electric screwdriver with the correct bits included with your kit? They’re $20 on Amazon, and I’d estimate that a significant portion of the time I spent assembling (perhaps even 10% - 20%) was spent screwing things in manually. Sure, users can go buy an electric screwdriver, but the goal is to make the experience as seamless and pain-free as possible – and including or offering the option of tools like this might serve as a signal to new users that they should buy one.
Jigs are included in the kit I assembled, allowing a builder to quickly determine whether everything is level and whether things like frame vertices are the appropriate distance from one another.
Instructions, and packaging the kit for mailing and storage
While the RepRap community has worked very hard to document all the steps in building one of these 3D printers, and while lots of good documentation is therefore available, what I thought was really needed was IKEA-like documentation that enforced a simple way of communicating each step to the user. Luckily, we are already much of the way there – someone has produced these visual instructions that are very close to what I think the ultimate goal could be. These instructions should probably be printed and bound, to allow several people to easily share them as a build process is happening.
I didn’t give a lot of thought to the larger boxes that the kit would be packaged in (including the trays, envelopes, instructions, etc.); I went with some relatively inexpensive ones that were an attractive blue, and that were the correct size for the plastic trays I had made.
Next steps and customer feedback
While I’m done with this project for now, I designed a survey to use in case I wanted to do further research on user requirements (many of the changes I made were based on informal conversations and my own experiences). I think this survey could be generally useful for product improvement as well, which is why I’m printing it here. Tracking customer feedback post-purchase would also be important for customer satisfaction and to improve future versions. You can click “Show Survey” to see it. Show Survey »
Descriptive
Please describe…
Your first encounter with this product.
Your first reactions after seeing this product.
The assembly process.
What came with your kit?
Why did you decide to build one of these? Will you build another one? Why or why not?
How does this product meet your needs?
Evaluative
What were the hardest / easiest parts about building your printer?
How would you rate…
The overall quality of the product.
The design of this product.
Please state the best aspects of this product. (Or what are its strengths?)
Please state the worst aspects. (Or what are its weaknesses?)
What were some surprising omissions or superfluities? How many (and what type of) spare parts did you end up with?
Suggestion-Generating
If you could change one thing about…
The printer, what would it be?
The build process, what would it be?
What workarounds did you use while you were building the product?
What workarounds do you use now?
Have you made any changes since you built it? If so, what are they?
What advice would you give someone building a printer today?
Value-added services
While this isn’t technically “packaging”, part of the user experience could be value-added 3D printer building services. I also think this could (and perhaps will) be an important source of revenue for open source 3D printer companies, and perhaps all open source hardware companies, going forward. Some of these services could include:
Build help. When I was building my Makerbot, I got so frustrated at one point that I posted some job listings for someone to help me finish it. Luckily, I became a member of Hive76 shortly thereafter and the guys there helped me out. But what about those who don’t have this option? Or those who just want to get the build done, quickly?
Repair and modification. Makerbots and 3D printers in general are designed to be modified and improved. Similar to the build help service, what if you could bring your bot to someone to have better parts installed?
That’s it for the composition of the kit. In the next and final entry, I’ll talk briefly about some of my conclusions from doing this project.