Marshmallows
July 19, 2010
Marshmallows have been on my “to make” list for a long time. How interesting it would be, I thought, to be able to make a marshmallow in any flavor I want! Also, it would be interesting to understand their chemistry.
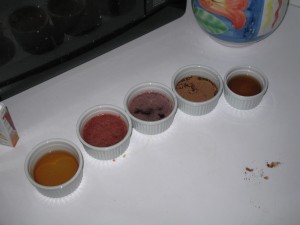 [caption id="attachment_831" align="alignleft" width="300" caption="Marshmallow bases: plain, strawberry, blueberry, chocolate, Kahlua"][/caption]
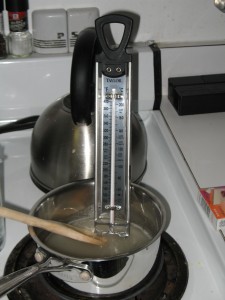 [caption id="attachment_832" align="alignleft" width="225" caption="The basic setup for making the corn syrup mixture..."][/caption]
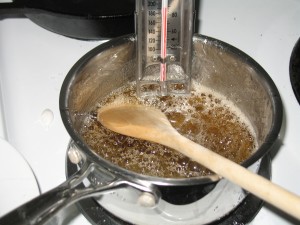 [caption id="attachment_833" align="alignleft" width="300" caption="...as the syrup boils, I watched the candy thermometer closely. The mixture needed to reach at least 234°, but could not be allowed to exceed 240°"][/caption]
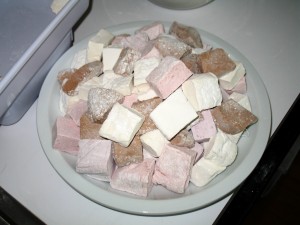
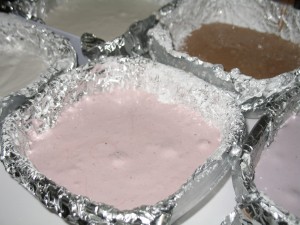 [caption id="attachment_834" align="alignleft" width="300" caption="The completed batches. These were left out overnight, laid out, and cut."][/caption]
 [caption id="attachment_830" align="alignleft" width="300" caption="Completed marshmallows!"][/caption]
(Note: This is a followup to this post.)
So, I decided to make a bunch as an intermission snack for my recent eight-course meal, using this recipe. In addition to the time-tested flavors of vanilla, chocolate and strawberry, I decided to try blueberry- and Kahlua-flavored marshmallows as well.
Initially, I was intimidated by the recipe. It’s one of the first things I’ve made that is highly time- and temperature-sensitive. But, having now done it a few times, it really is only 5 steps:
First, you make a mold. It has to be extremely nonstick, so I used food storage containers, covered in foil, and then covered in nonstick spray and cornstarch and powdered sugar.
Next, you combine water, your flavor components, and gelatin to make a base.
You then combine corn syrup and sugar and boil it. Once it reaches 234 degrees Fahrenheit, you take it off the heat and drizzle it into the flavor base, as you whip.
After about 5 - 10 minutes of whipping, you magically get marshmallow paste. This is poured into the molds to set.
The following morning, you extract the marshmallow loaves from their molds, cut them using a well-lubricated knife, and coat them in cornstarch and sugar so they don’t stick to everything.
Maybe it doesn’t sound that simple, I don’t know. I guess my point is, now that I have done it once, I don’t see why I was so concerned about it. The only difficult part is step 3; the rest of the steps can be done more or less at leisure.
Even the gelatin could theoretically be allowed to sit as long as you want - it will set up, but then the boiling sugar will melt it and it will set up again in time.
The plain, strawberry and chocolate marshmallows came out really well. The texture is so much nicer and fluffier than store-bought marshmallows. Eating a strawberry marshmallow is the first time I can honestly say I’ve gotten a burst of fruit flavor from consuming a marshmallow.
The Kahlua and blueberry marshmallows were tasty, but they didn’t get the flavor. In the Kahlua marshmallow, it’s there if you know where to look. In the blueberry marshmallow, it doesn’t show up at all. The problem is that the vast majority of the ingredients by volume are sugar and corn syrup (in the big recipe, you are looking at 1⁄2 cup of flavor to 5+ cups of generic ingredients). In the mini-batch recipe I used, you have only a few tablespoons of puree, to spread out across 20+ marshmallows!